

How To Scan and Convert Your Paper Planner into PDF and Edit in GoodNotes 5
If you have long wanted to digitize your paper documents, books, notes, or planners and continue to maintain them in digital PDF format - let's watch this training tutorial for GoodNotes 5.
With the built-in document scanner, we will do it in a couple of moments.
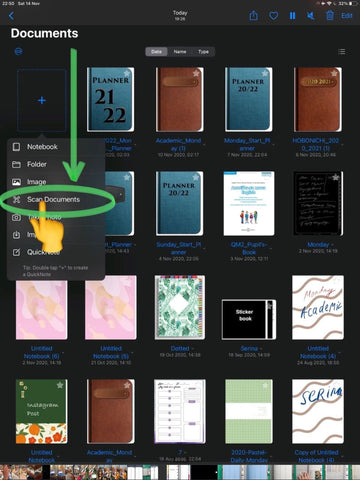
1) Open your document library in Good Notes and click on the button - New Document

2) Pay attention to the additional menu - select Scan document
3) Point the camera at the document, try not to shake the iPad if you see a rectangular highlighted area - Press the button - Take a photo.
If the wrong area of the document highlighted - do not worry; you can correct it after creating a photo scan
If the wrong area of the document highlighted - do not worry; you can correct it after creating a photo scan

4) After creating a photo - Click Keep Scan, then select a new page to scan

5) After you have scanned all the required pages - Click the Save button.
Important - press this button only at the end of the scan; if you press it after each scan - GoodNotes will create separate documents for each scanned page.
Important - press this button only at the end of the scan; if you press it after each scan - GoodNotes will create separate documents for each scanned page.

6) A slider will appear on the screen for converting scanned pages into a working PDF document. Now you can start taking notes or studying.

7) you can check if all the pages you scanned, open Page View and check them

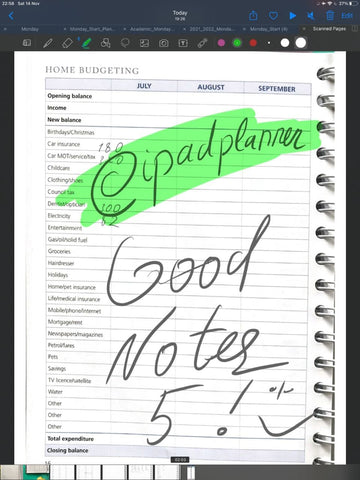
8) Now it's time to take notes, highlight the main thing and study your documents and materials

Thank you for reading the article on scanning paper documents and converting them to PDF files using Good Notes.
What another tutorial for GoodNotes do you want to find or learn? Write in the comments
Leave a comment